Let's Make A Multiplayer Game #1: Map And Player Movement
In this tutorial we are going to make the map and the player movement. Without further delay, let’s get started.
Map
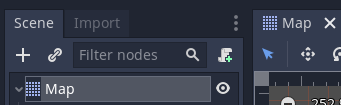
Create a new TileMap scene, change the name to “map” and save it. In my case, I will put it in a folder called “maps”.
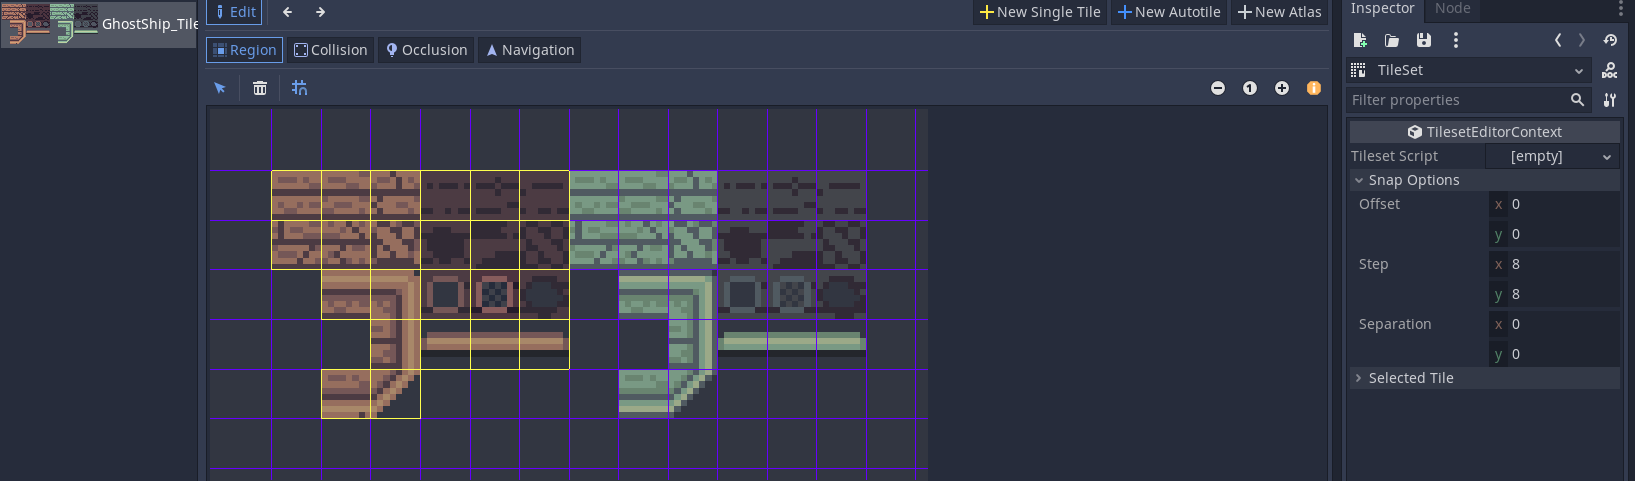
Now, create a new TileSet for the TileMap and open it. Load the tileset image. Enable the tile snap option and create a new tile. After that, the “Snap Options” dropdown appears at the right. Click it and change the step to 8 pixels, since that’s the size of the tiles we are using.
Now, create all the tiles you need. I’m going to pass this part fast because it’s very repetitive. Don’t forget to add collisions too. We are finished with the tileset. If you want you can add more TileMap nodesscene for decorations and platforms. I will not show it in the tutorial because it’s the same process as the TileMap we just configured.
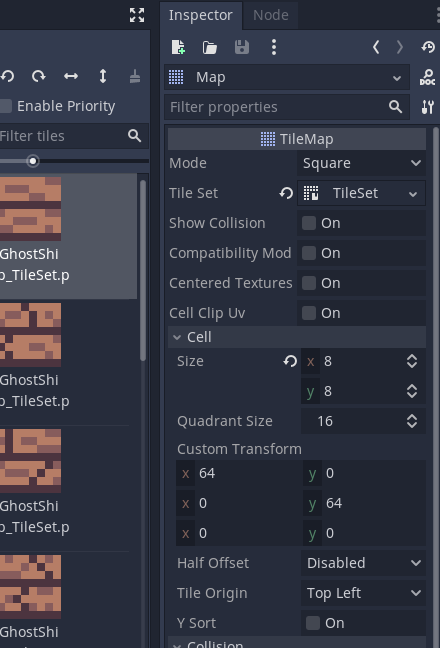
By default, the cells of the tilemap have a size of 64 pixels. To be able to place the tiles one at the side of the other, change the size to 8 pixels.
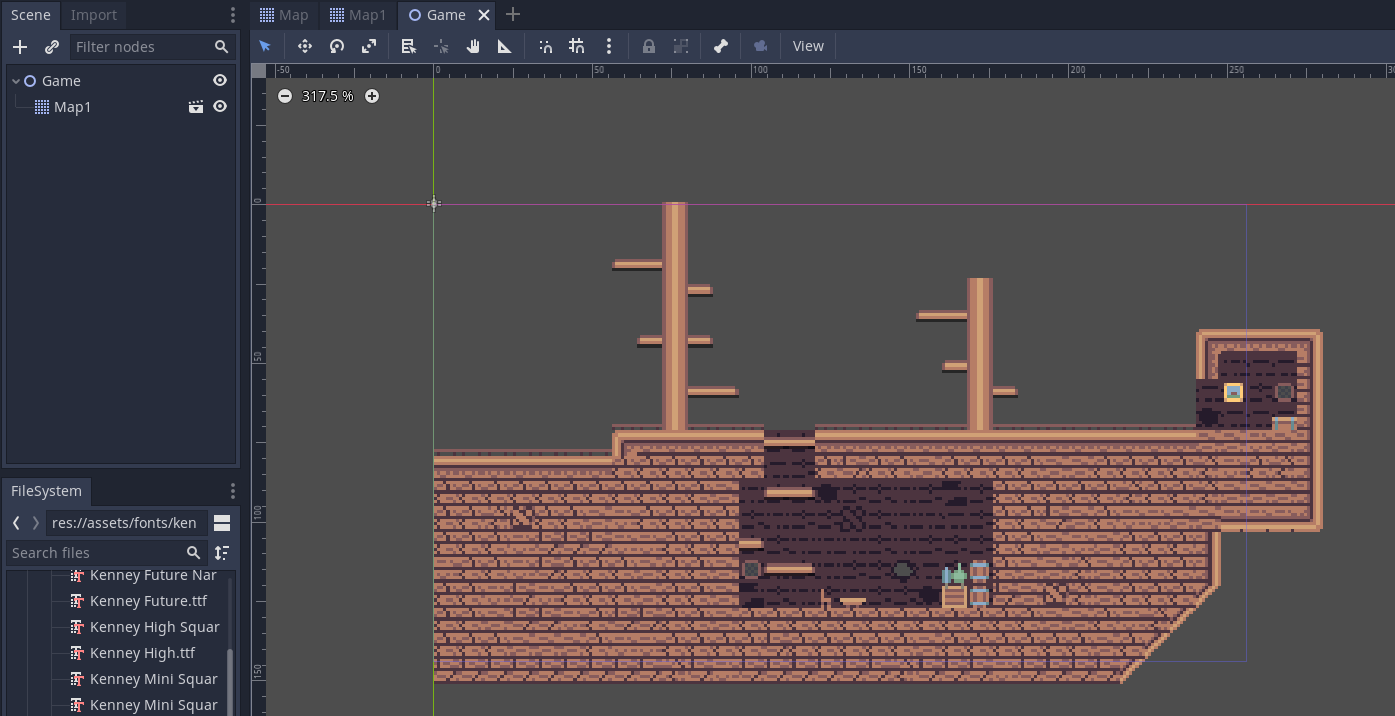
With the tiles ready, it’s time to start creating the map. But wait a moment! Not in this scene. Create a new inherited scene from this scene and create the map in this new scene. This way, we can extend the Map scene every time we want to create a map and we don’t have to create the tilemaps each time.
Okay, so this is the map I made. You can create your own. Instance the map as a child of the Game scene. Let’s move on and make the player.
Base character
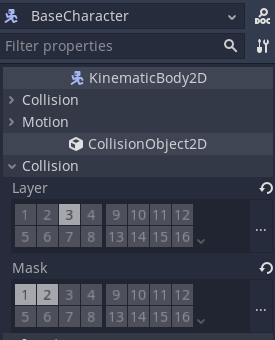
Create a new Kinematic2D scene and change the name to BaseCharacter. The player will inherit from this class and we will represent the other players with this scene. So, in this scene, we will add only the minimum things we need to represent a player.
Change the BaseCharacter collisions. The layer should be Player and the mask World and Platforms. With this mask, the BaseCharacter will be able to collide with the tilemap and the platforms.
Add 4 children nodes:
-
Add a Sprite node and load the characters texture. Open the “Animation” dropdown and set Hframes to 16, since there are 16 columns in the texture. But don’t change Vframes. We will select the row we want using the region rect, so, change the rect width to the width of the texture, 256 in my case, and the height to the height of a row, 16 in my case. In a later tutorial, we will change the region rect through code and select the row that contains the character the player selected. Changing the region rect allows us to use the same frames for all the characters. This way, we don’t have to create different animations for different characters.
-
Next, add a CollisionShape2D node and add a shape to it.
-
Add an AnimationPlayer node. We will make the animations in a moment, but, first, let’s add the last node.
-
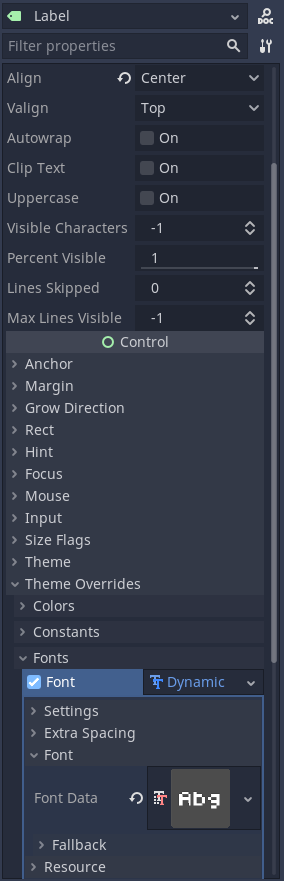
Add a Label to display the name of the character. Move the label at the top of the character, put some name at the text and center align it. The default font is blurred and ugly, so, replace it with some of the Kenney fonts. Go to “Theme Overrides” → “Fonts” and add a new DynamicFont. Click it, go to “Font”, and load the font you like the most.

Now that we have all the nodes, create a script. Add class_name BaseCharacter to make it easy to extend this script. Create a variable for the hp, let’s initialize it with 2, and add a setter.
In the setter function assign the new hp value to hp and if the hp is lees or equal to 0, call the function die. There is no die function yet, so create it. Add pass inside the function. We will implement it later in the player script.
Create a function called “damage” with an integer parameter. Inside the function, reduce the hp using this parameter. You have to use self to call the setter. We will call this function later from the hitbox.
Create 2 more empty functions: enable_hitbox and disable_hitbox. We will implement them in the player script, but we need them now to make the animations in this scene.
Finally, create an onready var for the sprite.
extends KinematicBody2D
class_name BaseCharacter

var hp: int = 2 setget set_hp

onready var sprite: Sprite = get_node("Sprite")


func damage(dam: int) -> void:
    self.hp -= dam


func enable_hitbox() -> void:
    pass


func disable_hitbox() -> void:
    pass


func die() -> void:
    pass


func set_hp(new_hp: int) -> void:
    hp = new_hp
    if hp <= 0:
        die()
For the moment, we are finished with the script, let’s make the animations. Create an idle, run, and dead animations. In the start of the 3 animations, call the disable_hitbox function from the script. Finally, create the attack animation. When the characters lower the sword, call the enable_hitbox function.
These functions are not doing anything for the moment, but they will do in the player scene.
Player
The base character is ready. Now, let’s create the player scene. Create a new inherited scene from the base character, name it Player, and save it. Let’s add some new nodes:
-
A Node node called StateMachine. We will attach the script later.
-
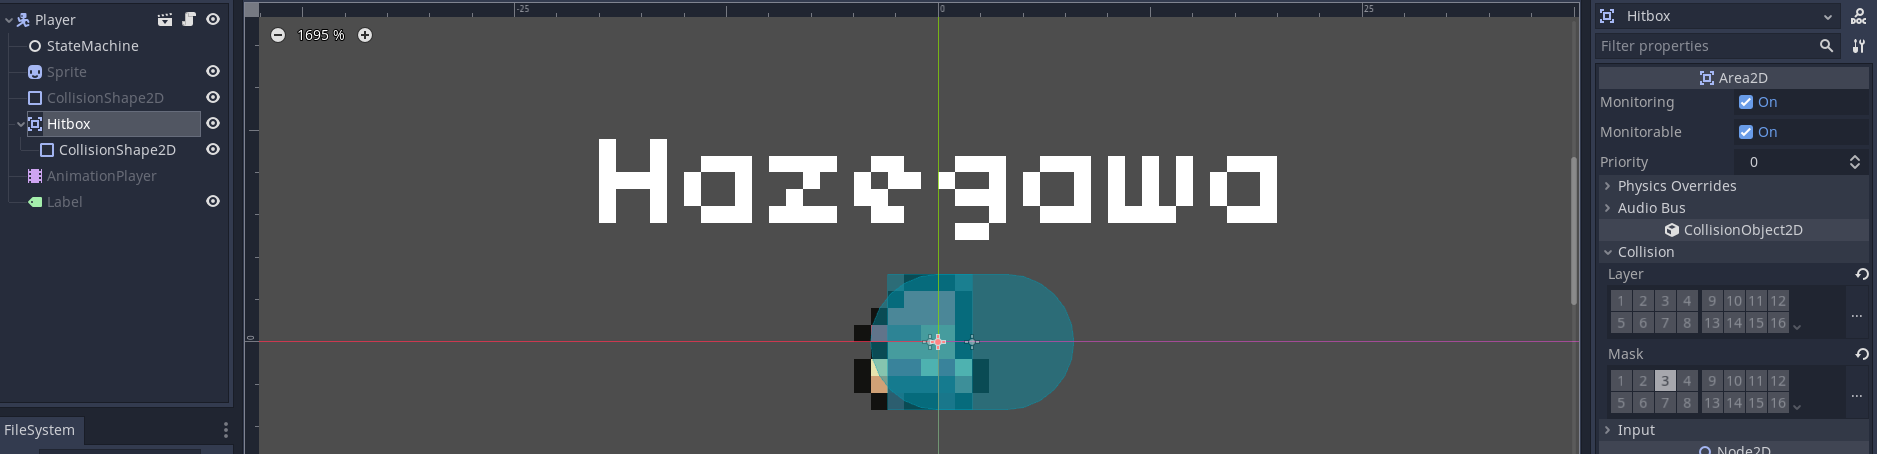
An Area2D node called Hitbox with a CollisionShape2D child. The shape of the collision shape should be at the right of the player, as far as the sword reaches. The collision layer of the area must be empty because nothing should collide with it. And the collision mask should be Player, since we want the hitbox to collide with others players.
Let’s make the player script. Create a new script for the player. Extend BaseCharacter to inherit the hp and the functions we made before.
Create 3 constants:
-
An integer called “GRAVITY” with a value of 200.
-
A float called “FRICTION” with a value of 0.1. You can change it, but it must be a value between 0 and 1, where 1 is the maximum friction, and 0 is no friction.
-
A float called ACCELERATION with a value of 0.25. Like the friction, his value must be between 0 and 1.
extends BaseCharacter

const GRAVITY: int = 200
const FRICTION: float = 0.1
const ACCELERATION: float = 0.25
Now, let’s add some variables:
-
An integer called speed that contains the speed of the player.
-
A float called dir that will contain the horizontal direction of the player. His value must be between -1 and 1.
-
An integer called jump_impulse that stores the value we will add to the velocity when the player presses the jump button.
-
A Vector2 called velocity that stores the current velocity of the player.
# [...]
var speed: int = 50
var dir: float
var jump_impulse: int = -85

var velocity: Vector2 = Vector2.ZERO
When the player dies, we don’t want him to move, so create a boolean variable called can_move. Initialize it to true, since we want the player to be able to move when we spawn him. Add a setter to the variable.
Create the setter function. Inside the function, assign the new value to the can_move variable. If can_move is false now, set the direction to 0 to make sure the player does not move in any direction when it’s killed.
var can_move: bool = true setget set_can_move

func set_can_move(new_value: bool) -> void:
    can_move = new_value
    if not can_move:
        dir = 0.0
Add 3 onready variables:
-
One for the state machine.
-
Another one for the AnimationPlayer.
-
And the last one for the hitbox CollisionShape2D.
onready var state_machine: Node = get_node("StateMachine")
onready var animation_player: AnimationPlayer = get_node("AnimationPlayer")
onready var hitbox_col: CollisionShape2D = get_node("Hitbox/CollisionShape2D")
Now that we have a variable representing the hitbox collisions, we can disable or enable it when the enable_hitbox and disable_hitbox functions are called. So, override these 2 functions and change the disabled property of the collisions accordingly.
func enable_hitbox() -> void:
    hitbox_col.disabled = false


func disable_hitbox() -> void:
    hitbox_col.disabled = true
To flip the player in the horizontal axis, create a new function called “_flip”. Inside the function change the flip_h property of the sprite to the contrary value that has now: if it was facing the right, it will face the left, and, if it was facing the left, it will face the right. But there’s something else we have to change too. The hitbox collision is facing the right, if the player changes the face direction, the hitbox collision should face that direction too. To do it, just multiply the x position by -1.
func _flip() -> void:
    sprite.flip_h = not sprite.flip_h
    hitbox_col.position.x *= -1
Let’s create a function to get the input from the player. Name it “_get_input”. First of all, get the direction in the x axis using the get_axis function and store it in the dir variable. If the direction is not 0, check if the direction is greater than 0 and the player is facing the left, or if the direction is less than 0 and the player is facing the right. If so, call the _flip function to flip the player. In case the direction is not 0, we also want to increase the velocity in that direction. I use the lerp function to increase the velocity smoothly until it reaches the speed specified in the speed variable.
After this, check if the player has pressed the jump button. If so, set the y component of the velocity to the jump_impulse variable.
func _get_input() -> void:
dir = Input.get_axis("ui_left", "ui_right")
if dir != 0:
if (dir > 0 and sprite.flip_h) or (dir < 0 and not sprite.flip_h):
_flip()
velocity.x = lerp(velocity.x, dir * speed, ACCELERATION)
if Input.is_action_just_pressed("ui_jump") and is_on_floor():
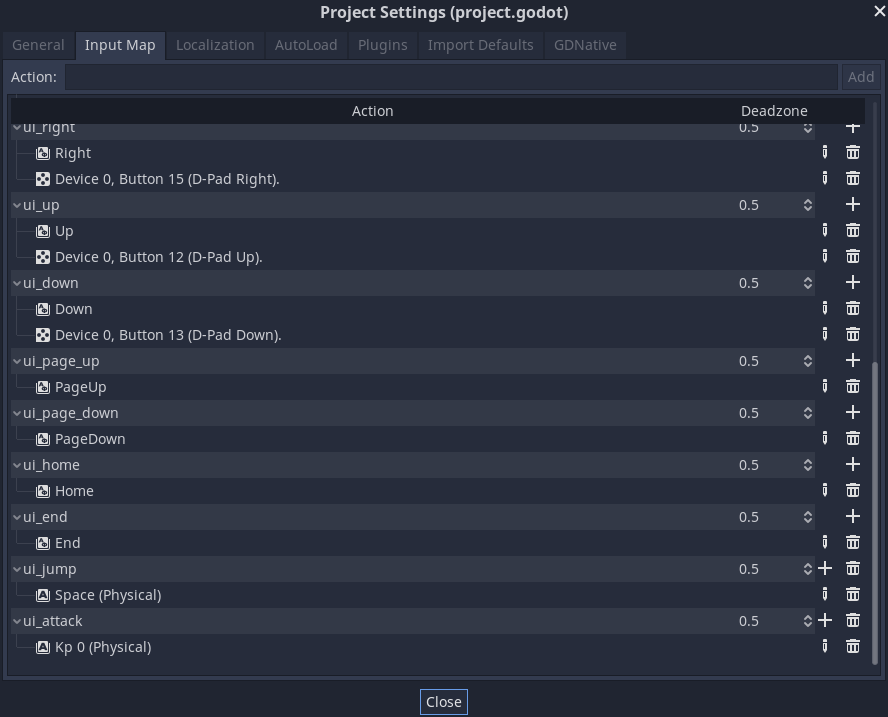
velocity.y = jump_impulseYou can create an input action to detect when the player jump, or you can just the “ui_up” action to make it jump when the up arrow is pressed. In my case, I will create a new action to jump. Open “Project Settings” → “Input Map” and add a new action called “ui_jump”. Add the space, or whatever key or keys do you want, in the input action.
Now that we are here, create the “ui_attack” input action too. I use the 0 key, chose whatever you want.
Back at the player script, create the _physics_process function. If the player can move, get his input. Next, apply the gravity. Add the gravity constant multiplied by delta to the y component of the velocity. Move the player using the move_and_slide function with the velocity. Pass Vector.UP as the second argument to indicate the up direction. Finally if the dir variable is 0, apply the friction interpolating the velocity with lerp to 0 using the friction constant.
func _physics_process(delta: float) -> void:
    if can_move:
        _get_input()

    velocity.y += GRAVITY * delta
    velocity = move_and_slide(velocity, Vector2.UP)
    if dir == 0:
        velocity.x = lerp(velocity.x, 0, FRICTION)
Godot can detect if the player is on the floor thanks to the Vector2.UP value we passed in the move_and_slide function.
Let’s test the movement. Open the game scene and instance the player scene. Play the project and try to move around. Feel free to modify the constants and the variables to adapt the movement as you want. The player also flips correctly when the direction changes.
That’s it for this tutorial. In the next one we are going to implement the state machine and the hitbox. Meanwhile, you can try to add platforms to the game. I already did a video about it, so I’m not going to repeat the same. Or you could try to implement the state machine yourself, the best way to learn is through practice.
