Let's Make A Multiplayer Game #2: State Machine And Hitbox
In this tutorial we are going to make the state machine and the hitbox. As you will see, I implemented the platforms. I’m not going to show it in the tutorial, if you are interested check my tutorial about platforms. But, anyway, the platforms don’t affect the rest of the game at all, so, it’s not necessary to add them. Let’s start implementing the state machine.
State Machine
Go to the player scene we made in the last video and add a script for the state machine node. First of all, define the states using an enum. The player will have 4 states:
- idle,
- run,
- attack,
- and dead.
Create an integer variable called “state” that stores the current state of the player. Initialize it to -1 to indicate that at the start it doesn’t have any state.
Also, add an onready variable for the player to access his properties.
extends Node

enum {
    IDLE,
    RUN,
    ATTACK,
    DEAD
}

var state: int = -1

onready var player: KinematicBody2D = get_parent()
Create a function called _get_transition that returns an integer. This function will tell us if the player have to switch state. Match the state variable. If we are in the idle state and the velocity have a length superior to 5, return the run state. If we are in the run state and the player has a velocity inferior than 5, return the idle state. If we are in the attack state and the Animationplayer is not playing, return the idle state. If the AnimationPlayer is not playing, it means that the attack ended. If none of these conditions match, return -1 to indicate the player must not switch state.
func _get_transition() -> int:
    match state:
        IDLE:
            if player.velocity.length() > 5:
                return RUN
        RUN:
            if player.velocity.length() < 5:
                return IDLE
        ATTACK:
            if not player.animation_player.is_playing():
                return IDLE

    return -1
Next, create another function, _enter_state with a parameter indicating the new state. We will execute this function every time the state changes, so it’s a good place to change the animations. With the help of a match statement, play the corresponding animation at each state. When we enter the dead state, set can_move to false too to disable the movement of the player.
func _enter_state(new_state: int) -> void:
    match new_state:
        IDLE:
            player.animation_player.play("idle")
        RUN:
            player.animation_player.play("run")
        ATTACK:
            player.animation_player.play("attack")
        DEAD:
            player.can_move = false
            player.animation_player.play("dead")
Now, to change the state, add a setter to the state variable and create the setter function. At the start of the function, check if the new value is different than the current value. If they are the same, we don’t need to do anything since we already are in that state. So, if they are different, assign the new value to the state variable and call the _enter_state function with the new value. This way, the animations will change automatically when we change the state.
var state: int = -1 setget set_state # I only added a setter, we declared the variable at the start of this section

# ...

func set_state(new_state: int) -> void:
    if state != new_state:
        state = new_state
        _enter_state(new_state)
To make the state machine work, we have to call the _get_transition function periodically to check if we should change the state. Let’s do it in the _physics_process function. Store the result of the _get_transition function in a variable called transition. If the value of transition is -1, the state should not change, so check it with an if. If transition is different than -1, call the set_state function with the value of the transition to switch to the new state.
func _physics_process(_delta: float) -> void:
    var transition: int = _get_transition()
    if transition != -1:
        set_state(transition)
The state machine is based on the one Game Endeavor made, the function names and the logic is the same, but I simplified it because we only need a state machine for the player.
Finally, open the player script and switch the state to idle when the player is ready.
# Player.gd

func _ready() -> void:
    state_machine.set_state(state_machine.IDLE)
Open the player script one more time and add an if at the end of the _get_input function. If the player just pressed the ui_attack input action, set the state to the attack state. When the state machine enters the attack state, it will play the attack animation. The is_action_just_pressed function only returns true if we were not pressing the action in the previous frame. So, I cannot keep the button pressed to attack non-stop. If you want to attack all the time without releasing the key, use is_action_pressed instead. This function will only check if the key is pressed this frame.
# Player.gd

func _get_input() -> void:
    # ...

    if Input.is_action_just_pressed("ui_attack"):
        state_machine.set_state(state_machine.ATTACK)
If you play the game now, the animations should work.
Let’s continue making the hitbox, but, before, a little tip.
You can make the Godot editor full-screen if you press shift + F11. If you press the keys again, you will exit the full-screen mode.
Hitbox
Create a new script for the Hitbox node. Create an onready variable for the player, the parent of the hitbox, and connect the body_entered signal to it. If the body that entered the hitbox is not the player himself, call the damage function of the body to apply the damage. Pass the damage you want to deal as the argument. That’s it, as simple as that.
# Hitbox.gd

extends Area2D

onready var player: KinematicBody2D = get_parent()


func _on_Hitbox_body_entered(body: Node) -> void:
    if body != player:
        print(body.name + " entered hitbox")
        body.damage(1)
To test the hitbox, print the name of the player who entered the hitbox. We cannot test it visually yet because the BaseCharacter does not have a state machine, so we could not tell when it dies, and we can’t instance another Player, since it would use the same keys to move and attack as our player. So until we implement the online part, the only way to see if the hitbox work is using a debug message.
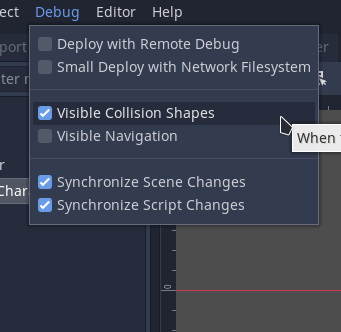
Let’s test it. Add a BaseCharacter somewhere in the game. To see when the hitbox is enabled, enable the “Visible Collision Shapes” option in the debug options.
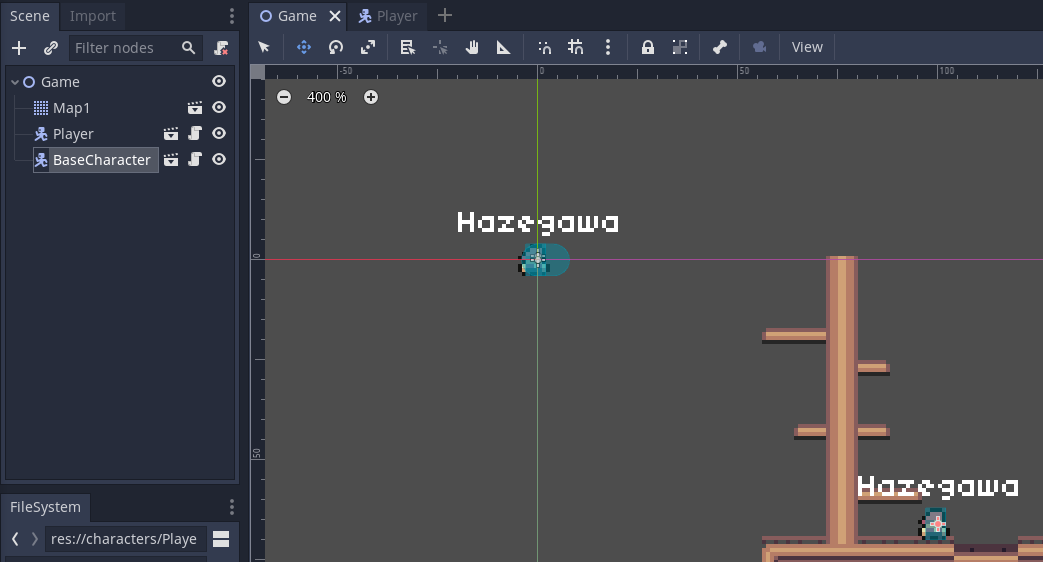
Try to attack. We can see that the hitbox is enabled when we attack. In the output, we can also see that the hitbox only collides with the other character.
End
With that, we have the basic gameplay done. From now on, I will focus on networking, if you want, you can try to improve the gameplay on your own. In the next tutorial, I will start making the menu where the players will be able to create or chose a room to join.
