Let's Make A Multiplayer Game #3: Server Connection And Room Creation
In this tutorial we are going to start making the menu and handle the connections. Let’s get started.
Client
Menu
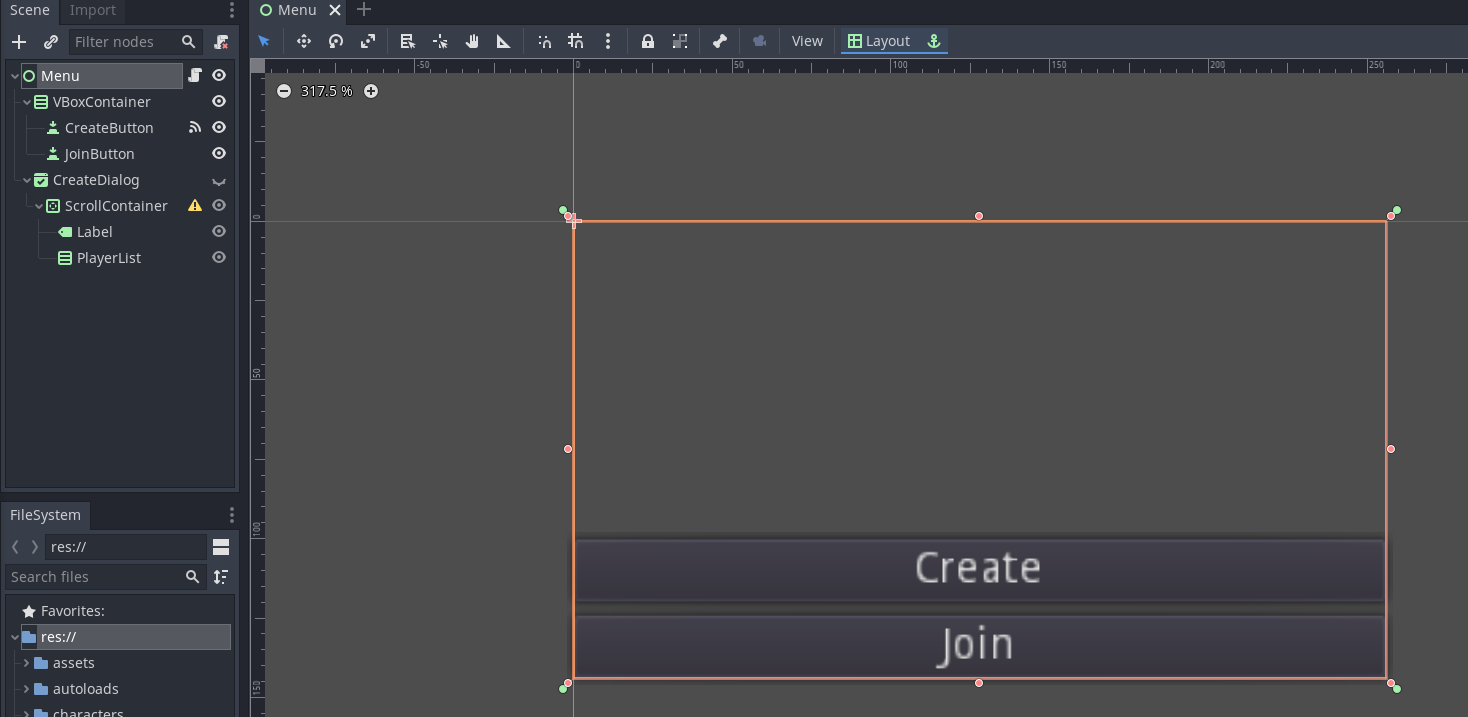
First of all, create the menu scene. This will be the main scene of the game. The players will be able to create a new room or join to an existent room. Add a VBoxContainer node for the buttons. Change the layout to ‘Full Rect’ to make it fill the entire screen.
Add 2 Button nodes: one to create a room and the other to join one. To move the buttons at the bottom of the screen, change the alignment of the container to ‘End’.
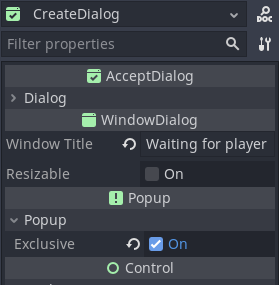
Let’s move on and create a popup dialog to create a room. To do it, add an AcceptDialog node as a child of the menu.
The WindowDialog nodes allows us to hide and show the nodes easily and they already have some functionality built-in, like a close button or an accept button in the case of AcceptDialog.
Add some title for the AcceptDialog. “Waiting for players…” seems fine to me. By default, the popup dialogues are automatically hidden when you click outside them. If you don’t want that, enable the ‘exclusive’ property.
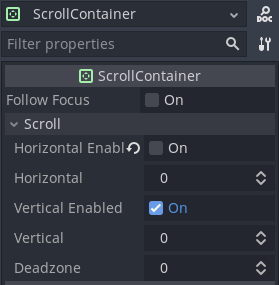
I want to show a list of the connected players in this window. Since there can be a lot of connected players, add a ScrollContainer. The ScrollContainer will allow us to scroll and see all the players when they overflow the window. The players will be represented in a vertical line, so we don’t need the horizontal scroll.
Inside this container, add a Label to show the id of the room. At the start, the player does not have a room id yet because he still has not connected. So, as the label text, put “Loading…”. When the server creates the room, it will send the id, and then we will update the label text. Add another VBoxContainer for storing the list of players.
Create a script for the menu. Let’s start with the onready variables. For the moment, we need 3 of them:
- one for the AcceptDialog,
- one for his label,
- and the last one for the player list container.
When the player presses the first button, the popup should appear. Connect the pressed signal of the button to the script. Inside the signal’s function, show the create dialog using the popup_centered function to center the window.
extends Control


onready var create_dialog: AcceptDialog = get_node("CreateDialog")
onready var create_dialog_label: Label = create_dialog.get_node("ScrollContainer/Label")
onready var create_dialog_player_list: VBoxContainer = create_dialog.get_node("ScrollContainer/PlayerList")


func _on_CreateButton_pressed() -> void:
    create_dialog.popup_centered()
Let’s try it. To make the menu scene the main scene, click the play button and click ‘Select Current’. So, if you press the create button, the popup will appear. It does not connect to the server yet, that’s what we are going to implement now.
Client autoload
Create a script called “Client” and save it. Since we need access to this script all the time, also when we are in the game scene, define the script as an autoload. At the start of the script, add 2 constants. I name the first constant “SERVER_ADDRESS” and it contains the address of the server. The best way to test the networking is using the localhost address, “127.0.0.1”. This is a special address that connects with our own computer. It allows us to test the game without uploading the code to any real server. The second constant contains the port the server is listening to. I choose 5466 because this port is free in my computer.
If you are using Linux, you can see a list with the assigned ports in /etc/services, it’s better if you don’t pick any port that is in the list, since they already have other services assigned to them.
extends Node

const SERVER_ADDRESS: String = "127.0.0.1"
const SERVER_PORT: int = 5466
Next, create a dictionary called my_info. Store in it the information of the player. It needs a name, I will put “Elizabeth” as default. It also needs a character index, since there are 4 players in the characters texture. With 0, the default character will be the first. And, finally, it needs an instance to change his position and animation easily. Initialize the instance to null, we will assign the instance later, when the game starts.
var my_info: Dictionary = {
    name = "Elizabeth",
    character_index = 0,
    instance = null,
}
We need information of the other players to display them in the game. To store this information, create another dictionary called “player_info” and initialize it to an empty dictionary. We will add the other players information when the server sends it to us.
Create 2 more variables: an integer called “is_creator” that stores whether this player is the creator of the room, initialize it to false, and another integer called room that it will store the room id.
var player_info: Dictionary = {}

var is_creator: bool = false

var room: int
To connect to the server, create a function called “connect_to_server” with an integer parameter that contains the room the players want to connect to. The default value of the parameter is 0, if we create the room, we won’t use the parameter. Assign the parameter to the room variable. Next, create a new instance of the class NetworkedMultiplayerENet. We can connect to the server using the create_client function of this class. We have to specify the address and the port of the server. Use the constants we created before. create_client can fail, in that case I print an error message with the printerr function. Assign the NetworkedMultiplayerENet instance to the network peer of the tree, so the connection will remain active while the game is running.
At the end of the function, connect the signals to monitor the connection. “connected_to_server” will be emitted when we connect successfully with the server. “connection_failed” will be emitted if the connection failed. Maybe because the address is wrong, the port is incorrect, or the server is not running. “server_disconnected” will be emitted when the server closes the connection. The connect function can return an error if it fails, so I use ifs to print an error message in that case. If you don’t handle the return value of connect, you will have warnings. If you don’t want to put all these ifs, you can ignore the warnings, you will get an error anyway if the connection fails.
func connect_to_server(room_id: int = 0) -> void:
    room = room_id

    var peer: NetworkedMultiplayerENet = NetworkedMultiplayerENet.new()
    if peer.create_client(SERVER_ADDRESS, SERVER_PORT):
        printerr("Error creating the client")
    get_tree().network_peer = peer

    if get_tree().connect("connected_to_server", self, "_connected_ok"):
        printerr("Failed to connect connected_server")
    if get_tree().connect("connection_failed", self, "_connected_fail"):
        printerr("Failed to connect connection_failed")
    if get_tree().connect("server_disconnected", self, "_server_disconnected"):
        printerr("Failed to connect server_diconnected")
Create the functions connected to the signals, for the moment, just print some text, we will implement them later.
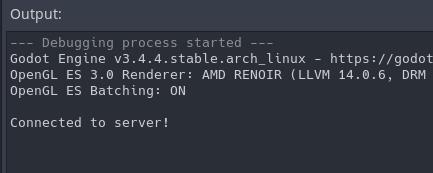
func _connected_ok() -> void:
    print("Connected to server!")
    if is_creator:
        rpc_id(1, "create_room", my_info)


func _connected_fail() -> void:
    print("Connection to server failed!!")


func _server_disconnected() -> void:
    print("Server disconnected!")
Create a new function called “create_room”. Inside the function change is_creator to true and call the connect_to_server function, we don’t specify the room_id argument because we are creating a room, not joining one.
func create_room() -> void:
    is_creator = true
    connect_to_server()
Now, open the menu script and, when the create button is pressed, call the create_room function of the Client autoload to connect to the server. But there is no server yet, so, let’s make it.
# Menu.gd

func _on_CreateButton_pressed() -> void:
    Client.create_room() # New
    create_dialog.popup_centered()
Server
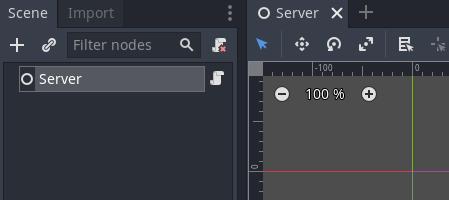
Create a new godot project for the server. Create a Node scene called Server and save it. Add a script to the node, we will put all the server code here.
Start adding a constant for the port. It has to be the same as the one we defined in the client, otherwise, we won’t be able to connect.
To store all the information of the rooms, create a dictionary called “rooms”. Each room needs a unique id, we will assign them starting at 0. Create a variable called “next_room_id” and initialize it to 0. After assigning this variable to a room id, we will increase it by 1, so, there won’t be any rooms sharing the same id.
But we have a problem. As the room games end, we won’t be able to reuse their ids with only the next_room_id variable. To keep tracks of the rooms that closed, create an array called “empty_rooms”. Before assigning next_room_id, we will check if there is some value in this array.
The rooms will have 2 states, create an enum to store them:
- WAITING when we are in the menu waiting for other players, and
- STARTED when the game starts.
extends Node

const SERVER_PORT: int = 5466

var rooms: Dictionary = {}

var next_room_id: int = 0
var empty_rooms: Array = []

enum { WAITING, STARTED }
Let’s initialize the server in the _ready function. Create a new instance of NetworkedMultiplayerENet and call his create_server function. The first argument is the port. The second argument represents the number of players who can connect to the server simultaneously. The default value is 32, that’s more than enough for the project, so I’m not going to specify a different value. As with the create_client function, create_server can fail. If it fails I print an error message and I stop the server. If the server does not even start, it’s senseless to continue executing the project. After that, assign the instance of NetworkedMultiplayerENet to the network_peer of the scene tree.
Next, connect 2 signals. “network_peer_connected” will be emitted when a client connects, and “network_peer_disconnected” will be emitted when a client disconnects. As with the Client signals, if the connection fails, I print an error message. But, in this case, if they fail, I stop the server because without these 2 signals the server cannot work normally.
func _ready() -> void:
    var peer: NetworkedMultiplayerENet = NetworkedMultiplayerENet.new()
    if peer.create_server(SERVER_PORT):
        printerr("Error creating the server")
        get_tree().quit()
    get_tree().network_peer = peer

    if get_tree().connect("network_peer_connected", self, "_player_connected"):
        printerr("Error connecting network_peer_connected signal")
        get_tree().quit()
    if get_tree().connect("network_peer_disconnected", self, "_player_disconnected"):
        printerr("Error connecting network_peer_disconnected signal")
        get_tree().quit()
Create the functions connected to the signals. For the moment, add some message when the function is called.
func _player_connected(id: int) -> void:
    print("Player with id " + str(id) + " connected")


func _player_disconnected(id: int) -> void:
    print("Player with id " + str(id) + " disconnected")
With that, the server is ready to start listening for clients. It won’t do anything for the moment, but we should be able to connect to it using the client. We can make sure it works, looking at the output of the prints we put in the functions connected to the signals.

Room creation
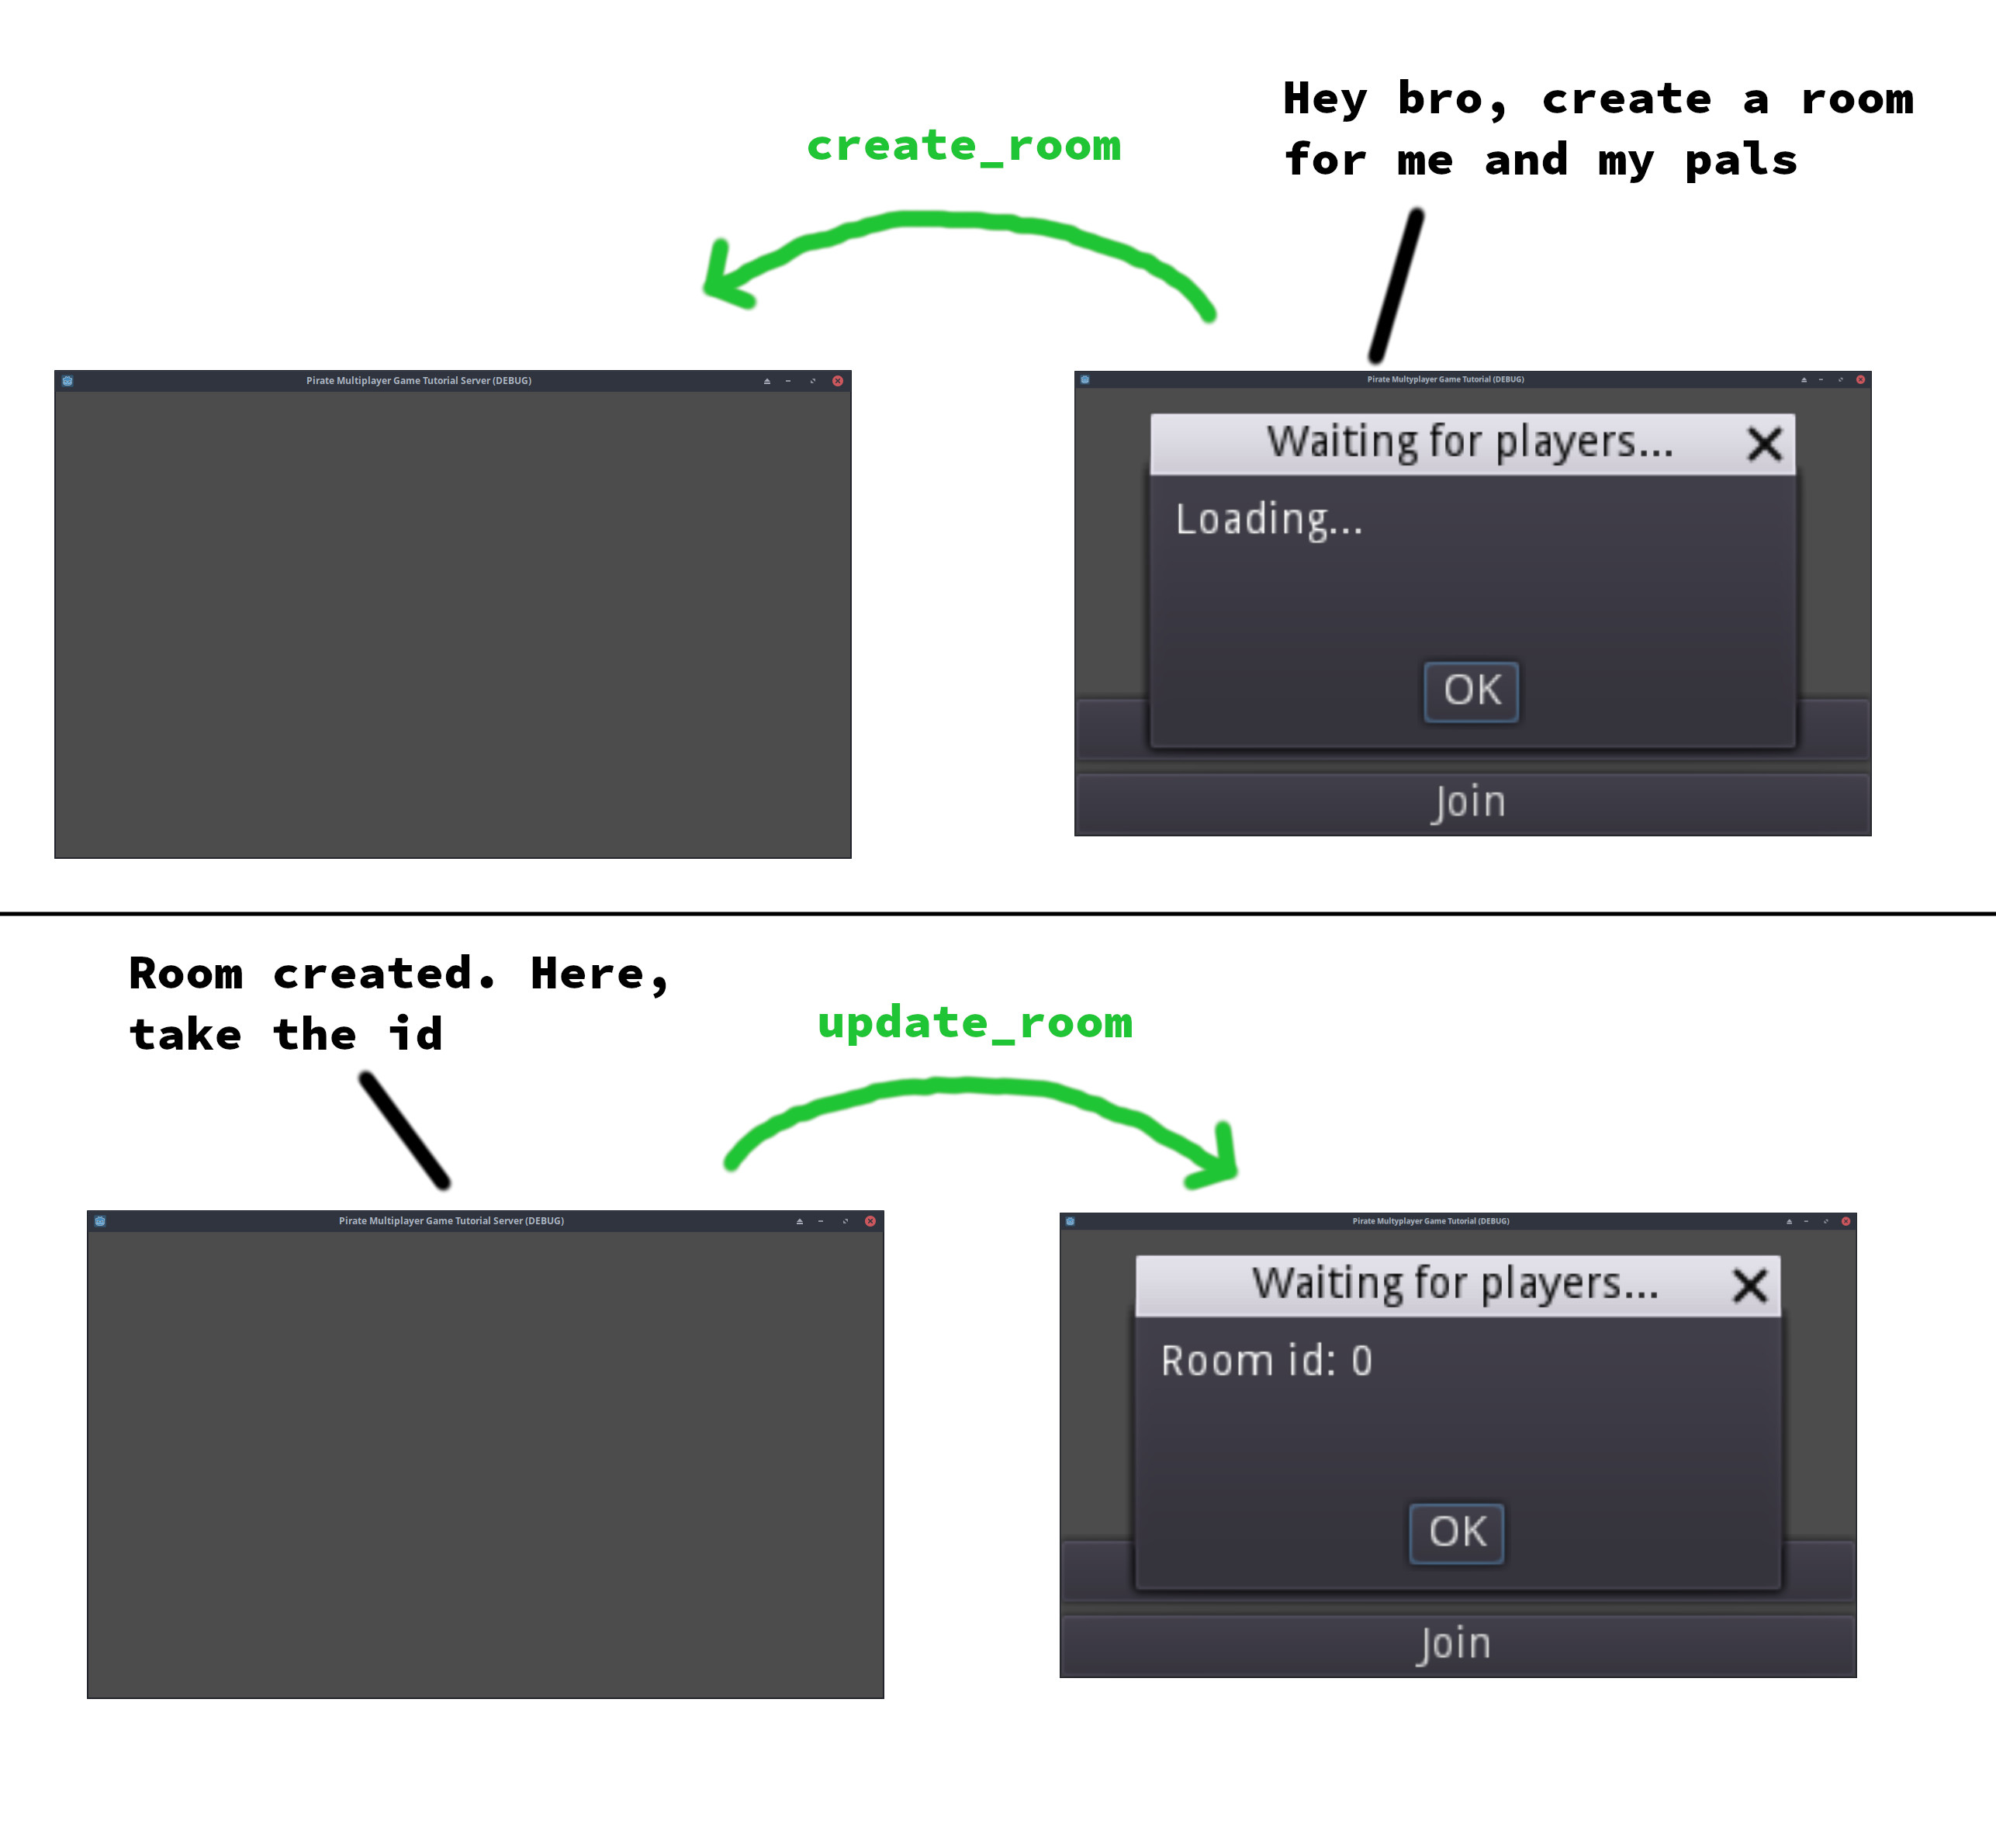
To end the tutorial, we are going to create a room in the server and send the id to the client to update the label that says “loading…”.
Back at the client project, open the client script and go to the _connected_ok function. This function is connected with the “connected_to_server” signal and will be called when we establish a connection with the server. So, if the player pressed the “create” button, we will tell the server to create a room. Check if is_creator is true. If so, it means that it clicked the “create” button. In that case, call the create_room function of the server. To do that, we use the rpc_id function. This function let’s us call a function from another peer, the one that has the id we specify in the first argument. The id of the server is always 1. The second argument is the name of the function. The rest of the arguments are the arguments of the function we specified. Pass the client info.
# Client.gd

func _connected_ok() -> void:
    print("Connected to server!")
    if is_creator:
        rpc_id(1, "create_room", my_info)
Now, go to the server project and create the function, otherwise we won’t be able to call it. We have to add remote before the function declaration. The remote keyword allows the function to be called remotely, without remote, we would not be able to call the function from the client.
Inside the function, print a message indicating the room has been created. To get the id of the client who called the function, we can use the get_rpc_sender_id() function of the scene tree.
Next, create a variable called room_id. If the array of empty rooms is empty, assign the value of next_room_id to the variable and increase next_room_id by one. If the array of empty rooms is not empty, we pick the last closed room using the pop_back() function.
Now that we have the id of the room, let’s create an entry in the rooms dictionary. The key is the id of the room. Save the id of the player who created the room, the one who called the function. We will also store a dictionary with all the players information, initialize it to an empty dictionary. Also, add players_done to keep track of the players who are ready to start the game. And, finally, store the state of the room. The initial state is WAITING, since when the function is called, the client is in the menu and the game has not started yet. At the end of the function, call the _add_player_to_room function. We are going to create the function in a moment. The first argument is the id of the room, the second argument is the id of the player we want to add, and the third argument is the information of the player.
# Server.gd

remote func create_room(info: Dictionary) -> void:
    print("Room created")
    var sender_id: int = get_tree().get_rpc_sender_id()

    var room_id: int
    if empty_rooms.empty():
        room_id = next_room_id
        next_room_id += 1
    else:
        room_id = empty_rooms.pop_back()

    rooms[room_id] = {
        creator = sender_id,
        players = {},
        players_done = 0,
        state = WAITING,
    }

    _add_player_to_room(room_id, sender_id, info)
Create the function. Get the room using the room id as a key in the rooms dictionary. Then assign the player info in the players dictionary, using the id of the player as the key. This way, we will be able to access the information of the player using his id. Now that the player has been added to the room, we want to tell the client to update the label that says “loading”. Use rpc_id to call the update_room function of the client. We use the id of the player who joined as first argument, so, the player who just joined the room will execute the function. Pass the id of the room as the last argument, so, the update_room function will be called with the id of the room as argument.
# Server.gd

func _add_player_to_room(room_id: int, player_id: int, info: Dictionary) -> void:
    rooms[room_id].players[player_id] = info

    rpc_id(player_id, "update_room", room_id)
Now, the last thing we have to do is implement this function in the client. Open the client project and add the update_room function in the client script. Remember to add the remote at the start to indicate the function will be called remotely.
First, check that we are in the menu scene comparing the name of the current scene to the string “Menu”. If we are not in the menu, we cannot update the label. So, if we are in the menu, call the update_room function of the menu script.
# Client.gd

remote func update_room(room_id: int) -> void:
    if get_tree().current_scene.name == "Menu":
        get_tree().current_scene.update_room(room_id)
Open the menu script and add the function. Change the text of the label of the create dialog. It should be something like “Room id: ” and the id of the room.
# Menu.gd

func update_room(room_id: int) -> void:
    create_dialog_label.text = "Room id: " + str(room_id)
If you try to connect to the server now, you should see some errors.
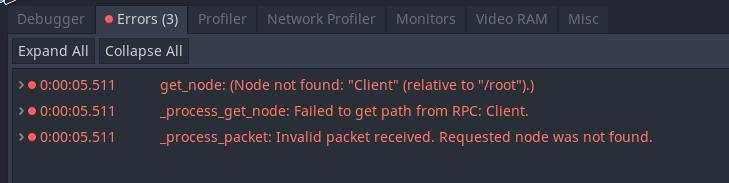
We can see that Godot is complaining about not finding the Client node. But why is he looking for the Client node in the server? Let me explain it. Godot only let’s us communicate between nodes that are in the same position in the scene tree in both projects. When we call functions from the script in the Client node of the client project, he expects to find the same node in the server. ¯_(ツ)_/¯. So, just change the name of the Server node to “Client” and they will be able to communicate because now they have the same name and the same position in the scene tree.

Let’s try it one last time. Now, when the client connects, the server sends the id of the room to it and the label is updated.

I know all of this could seem complex at the start. For that reason, let’s end the tutorial with an image that summarizes the process.