Let's Make A Multiplayer Game #9: Character Selector
In this tutorial we are going to make a character selector. After the tutorial, you will be able to chose a texture and a name for your character.
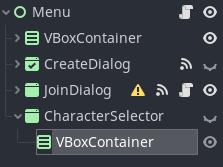
In the menu scene, add a new WindowDialog node. Set the title to “Character selector” or something like that. This node will contain the options to customize our character.
Add a VBoxContainer as a child of the WindowDialog. Add some margin to leave some space between the nodes we will add and the borders.

Character selector
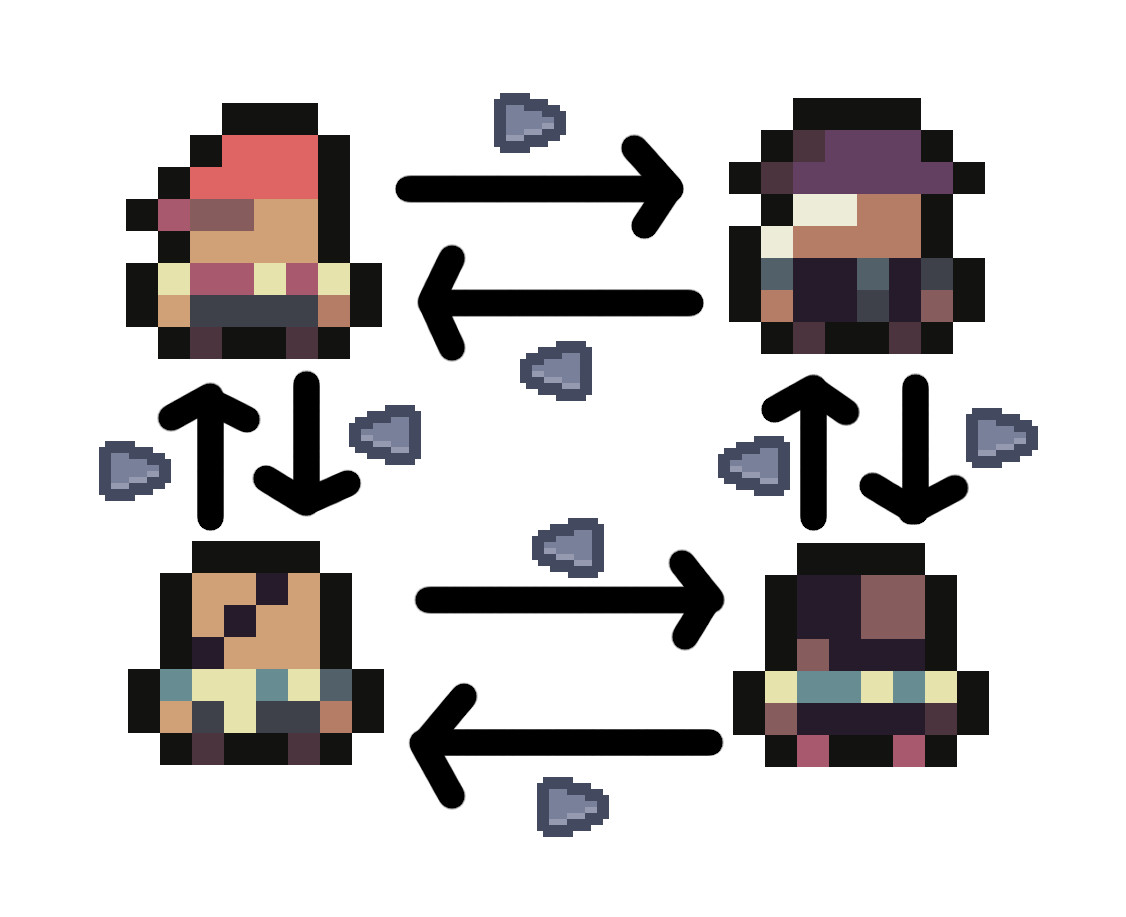
Let’s start making a character texture selector. To change characters, I will use the arrow image from the Kenney input prompts asset pack. To represent the characters, I picked the first idle frame of each character and I increased the size. You can download the images from the GitHub repository.
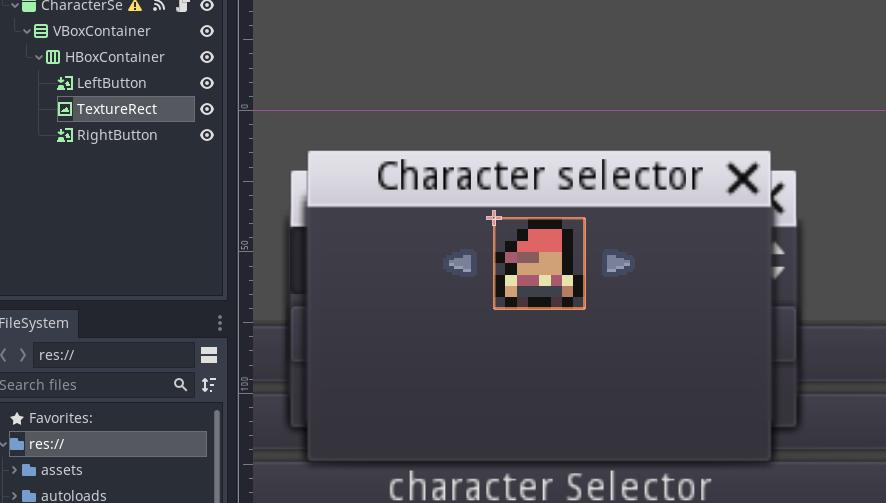
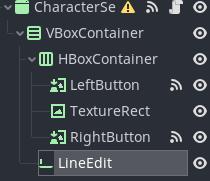
Add a HBoxContainer. Inside it, add a TextureRect with the icon of the first character. We will change this texture to show the selected character.
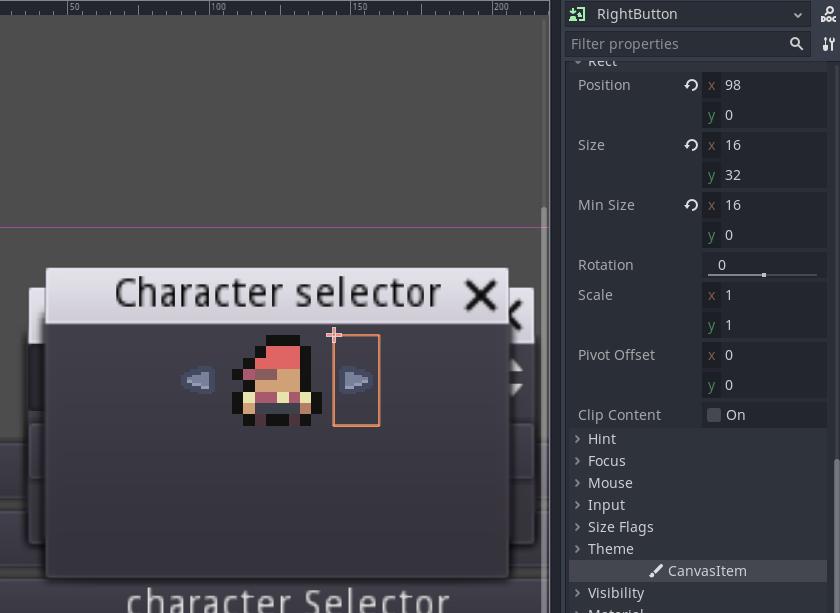
To change the character, add 2 TextureButtons. Name them “LeftButton” and “RightButton”. To center them, check “expand” and change the stretch mode to ‘Keep Centered’. In the left button check ‘Flip H’ too, to make it face the left.
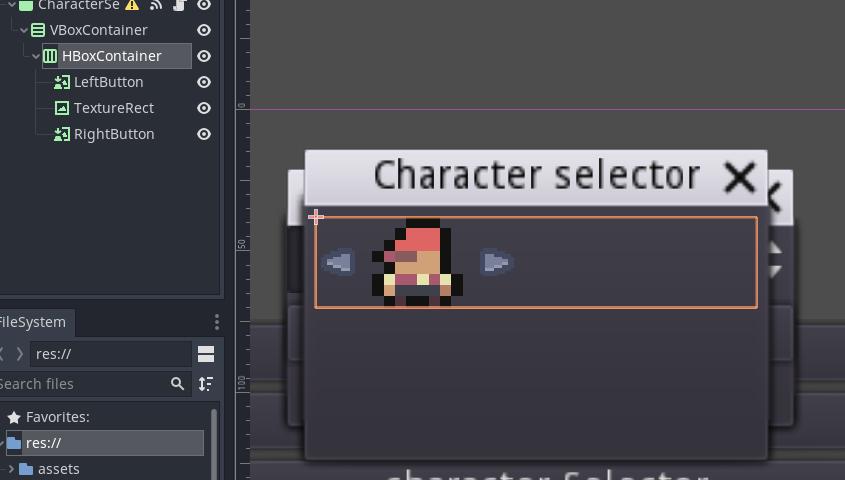
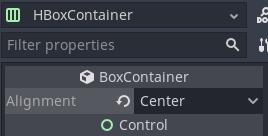
To center the character and the buttons, set the alignment property of the HBoxContainer to ‘Center’.
Put some minimum size for the x axis to make the buttons have some clickable area.
Now, create a script for the CharacterSelector node. Define a constant called NUM_CHARACTERS that stores the number of available characters, 4 in my case. Also, create an onready variable for the TextureRect that shows the selected character.
Create an integer variable called “character_index” with a default value of 0. Add a setter to the variable and add the setter function. Inside it, check if his new value is less than 0. If so, change character_index to the number of characters minus 1, since the indexes go from 0 to the number of characters minus 1. If the new index is equal or greater than the number of characters, change character_index to 0. Otherwise, just set character_index with the new value.
# CharacterSelector.gd

extends WindowDialog

const NUM_CHARACTERS: int = 4
var character_index: int = 0 setget set_character_index

onready var character_texture: TextureRect = get_node("VBoxContainer/HBoxContainer/TextureRect")

func set_character_index(new_index: int) -> void:
	if new_index < 0:
		character_index = NUM_CHARACTERS - 1
	elif new_index >= NUM_CHARACTERS:
		character_index = 0
	else:
		character_index = new_index
All this code, makes the selected character move in a cycle. If we try to move to the character in the right of the last one, the first character will appear. And, if we try to move to the character in the left of the first one, we will go to the last one.
Finally, set the texture of the TextureRect with the corresponding character image. All my character icons start with “character” and end with their index, so, I can use the character_index variable to select the correct one.
![]()
# CharacterSelector.gd

func set_character_index(new_index: int) -> void:
    # ...

	character_texture.texture = load("res://assets/images/GhostShip_Assets/character_icons/character" + str(character_index) + ".png")
But, how do we change the selected character? That’s easy, connect the pressed signals of both buttons: the LeftButton and the RightButton. When the LeftButton is pressed, decrease character_index by 1. And, when the RightButton is pressed, increase it by 1. Don’t forget to use self to reference the character_index variable. Otherwise, the setter won’t be called.
# CharacterSelector.gd

func _on_LeftButton_pressed() -> void:
	self.character_index -= 1


func _on_RightButton_pressed() -> void:
	self.character_index += 1
Connect the about_to_show signal of the WindowDialog. Inside the function, change the value of character_index to the value in the my_info dictionary. This way, when we open the character selector, the default value in the my_info dictionary will determine the character that will show up.
Also, connect the popup_hide signal. When we close the window, change the character_index of the my_info dictionary to the value contained in the character_index variable. This way, the selected character will be saved when we close the window.
# CharacterSelector.gd
func _on_CharacterSelector_about_to_show() -> void:
self.character_index = Client.my_info.character_index
func _on_CharacterSelector_popup_hide() -> void:
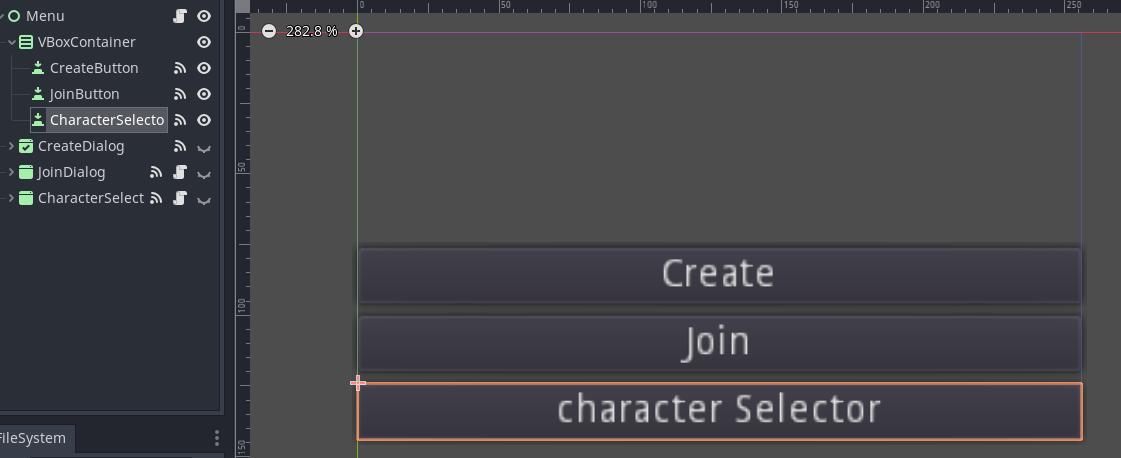
Client.my_info.character_index = character_indexTo open the character selector, add a new Button in the vertical container where the other buttons are. Change his text to something like “Character Selector”.
Connect his pressed signal to the menu script. Before implementing the function, create an onready variable for the CharacterSelector node. Back at the function connected to the pressed signal, call the popup_centered function of the CharacterSelector. This way, when the button is pressed, the window with the character selector will appear at the center of the screen.
# Menu.gd

onready var character_selector: WindowDialog = get_node("CharacterSelector")

func _on_CharacterSelectorButton_pressed() -> void:
	character_selector.popup_centered()
Let’s try it. If you open the character selector, you can switch the character pressing the arrow buttons. But, if we play the game, we see the initial character, not the selected one.
That’s because, if you remember, we are ignoring the character_index parameter we pass in the character’s initialize function. Go to the function in the BaseCharacter script and let’s finish it.
Calculate the height in pixels of a character. We can get the height of the texture with the get_height function. The texture has 4 characters, to get the height of a character, we have to divide the total height by 4.
We get a warning because we are trying to divide 2 integers and we will lose the decimal part. To fix it, just add .0 after the four, so it will be treated as a float.
# BaseCharacter.gd

func initialize(id: int, name: String, character_index: int) -> void:
	# ...

	var character_height: float = sprite.texture.get_height() / 4.0
Now, we have to change the region_rect of the sprite to use only the part of the texture with the selected character. region_rect is of Rect2 type, so we have to use a Rect2 to set the value:
-
In the first argument, put a 0, since we want to start always at the 0 position of the x axis.
-
The second argument is the y point where the texture will start, multiply the height of a character by the character index and we will get it.
-
The third argument is the width of the texture. Since the spritesheet contains one character per row, use all the width of the spritesheet.
-
Finally, the fourth argument indicates the height of the zone of the texture we want to use. We already calculated it, it’s the character_height variable.
# BaseCharacter.gd

func initialize(id: int, name: String, character_index: int) -> void:
	# ...

	var character_height: float = sprite.texture.get_height() / 4.0
	sprite.region_rect = Rect2(0, character_height * character_index, sprite.texture.get_width(), character_height)
With this, the sprite will only use the spritesheet’s row of the selected character.
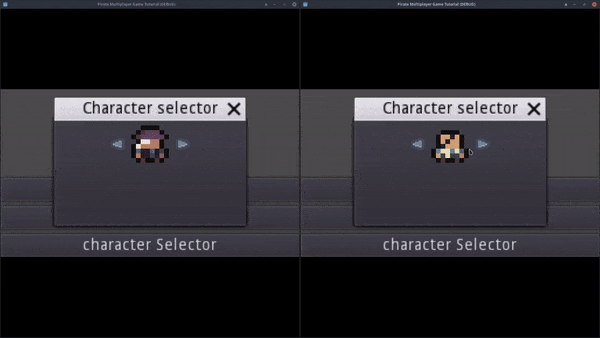
Let’s try it again. I opened 2 clients and I selected a different character for each one. If we start the game, the character are correct now, each one of the players has the character he selected.
Change name
It’s a little boring if all the characters have the same name. Let’s make the players able to modify their name too.
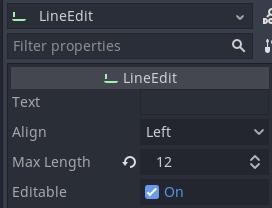
To be able to type the name, add a LineEdit node as a child of the vertical container of the character selector.
We can define a max length to limit the number of characters the player can enter. I am going to set the maximum to 12 characters.
Now, go the character selector script and create a new onready variable for the LineEdit we just added. When the character selector is opened, change text of the LineEdit to the text in the name of my_info dictionary. When we close the character selector, update the name of the my_info dictionary with the value in the LineEdit.
# CharacterSelector.gd

func _on_CharacterSelector_about_to_show() -> void:
	self.character_index = Client.my_info.character_index
	name_line_edit.text = Client.my_info.name


func _on_CharacterSelector_popup_hide() -> void:
	Client.my_info.character_index = character_index
	Client.my_info.name = name_line_edit.text
It’s the same we did with the character index. This makes the name in the my_info dictionary and the LineEdit keep synced.
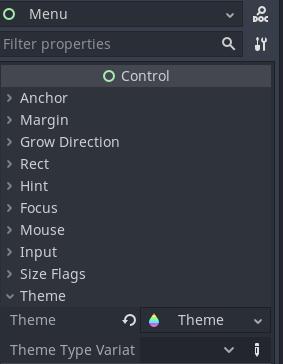
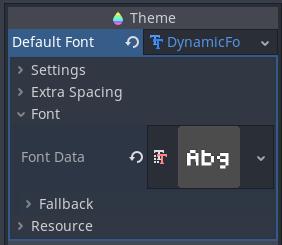
Before trying it, let’s change the font to make the UI a little more beautiful. Add a new Theme in the Menu node, the root node. Change the default font of the theme to the one you prefer. All the children node inherit this theme, so, all the UI will use this font from now on.
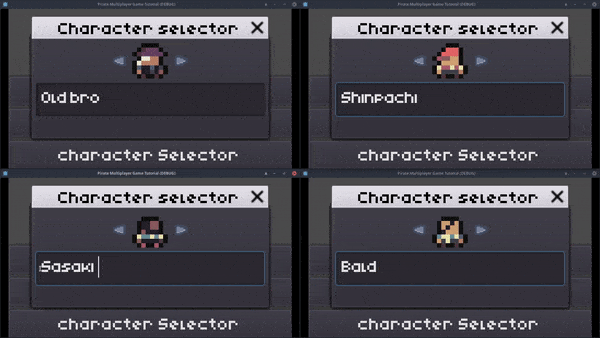
I opened for clients to test it. I selected a different character for each one. I also changed their name. We can see that, because I put a character limit of 12 characters, I can’t type the last letter of “Sasaki Kojiro”.
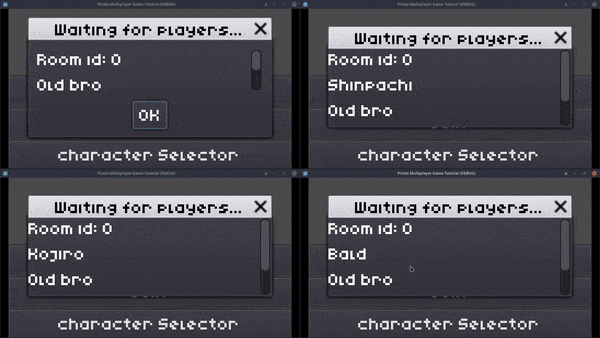
The Character names appear in the player list when we join a room. And, when we play the game, they appear on top of their character.
That’s pretty much all I wanted to make in this series, but, before ending, I would like to add some error messages when a client tries to connect to an nonexistent room or a room whose game already started. So, see you in the next tutorial.
